//
Subscribe to the Tabnine newsletter
//
Get news and updates about AI, software development, and more.

If you’re an Ubuntu user developing an Android app, or an open source enthusiast looking to tinker with the OS without bricking your device, the official Android Studio IDE (integrated development environment) from Google is a piece of software you need to install. This guide will walk you through the installation process of Android Studio on Ubuntu 16.04/17.10/18.04, and is suited for users of all levels.
Like with most actions and applications on any Linux machine, there are multiple ways to install Android Studio on Ubuntu. Included in this guide are the most straightforward couple:
To run Android Studio smoothly on your machine, you will need:
Before you install the Android Studio IDE, you need to make sure your Ubuntu installation is armed and ready with the recommended Java development kit for Android Studio – Oracle JDK.
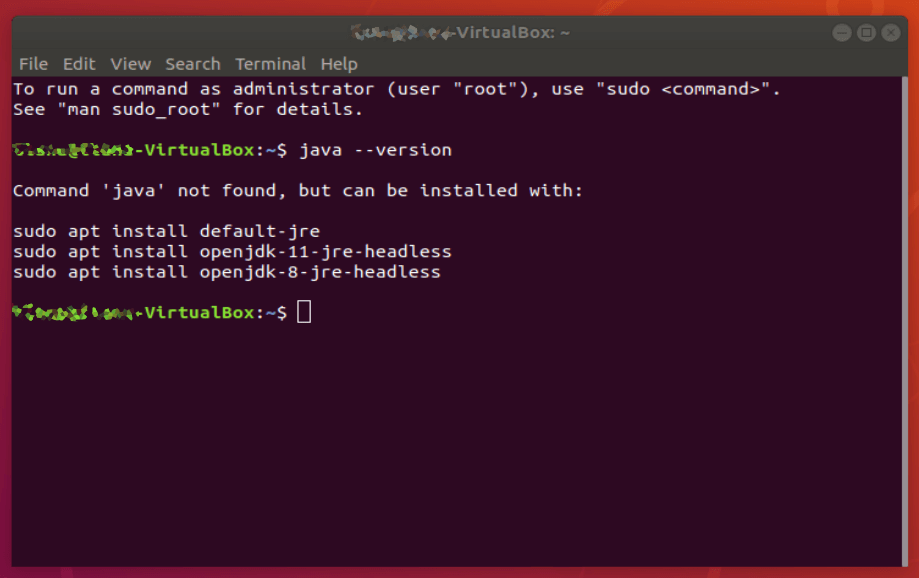
To check the version of Java currently running on your machine, use the terminal to run the following command:
java --version
If you don’t have Java installed, the output should be something like:
Command ‘java’ not found, but can be installed with:
sudo apt install default-jre
sudo apt install openjdk-11-jre-headless
sudo apt install openjdk-8-jre-headless
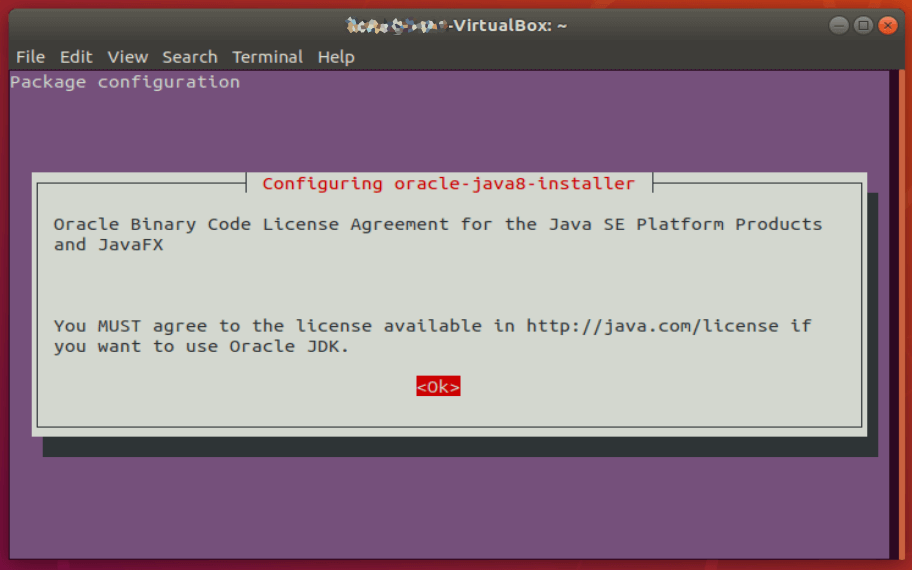
This is Ubuntu giving you hints on how to set up one of the default Java engines on your machine. Since Android Studio can be finicky about its Java, we’re going to ignore these options and install the Oracle JDK with the following commands:
sudo add-apt-repository ppa:webupd8team/java
sudo apt-get update
sudo apt-get install oracle-java8-installer
The download may take some time, so depending on your internet speed, this might be a good time to get some Java (or other caffeinated beverage) of your own. Once the download and installation are done, make sure to set the Oracle Java as the default:
sudo apt-get install oracle-java8-set-default
Next, verify the installation by typing:
javac --version
The result you should get is something like:
javac 1.8.0_201
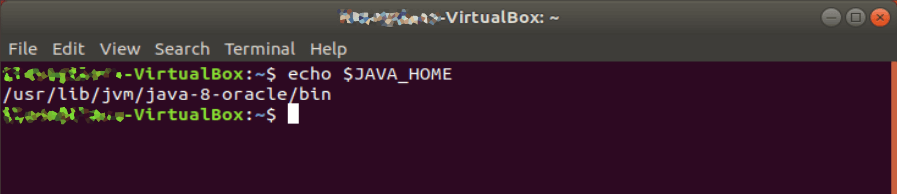
Make sure to note the path of your Java installation. If you followed the instructions above, it will be /usr/lib/jvm/java-8-oracle/bin .
Finally, you will need to set the JAVA_HOME environment variable in Ubuntu to the location of your JDK installation. To do that, you will need to edit the .bashrc file. Switch to root by typing:
sudo su
To edit the bash file, enter:
gedit .bashrc

At the very end of the file, after the last fi, add the following lines:
JAVA_HOME=/usr/lib/jvm/java-8-oracle/bin
export JAVA_HOME
PATH=$PATH:$JAVA_HOME
export PATH
Save the bash file, restart the terminal, and type echo $JAVA_HOME to make sure the path is properly set.
Linux is traditionally used in CLI (command line interface) mode (or terminal), but Ubuntu is working hard to make Linux accessible even to those of us raised on Windows and Mac and unused to typing commands. Part of that effort was including popular software packages and apps in the Ubuntu version of the app store – the Software Center – in the form of Snap packages. The installation process is really as easy as it gets.

Locate the Ubuntu Software Center icon in your taskbar and use the search functionality to find Android Studio. Click install and let it download and run initial setup.
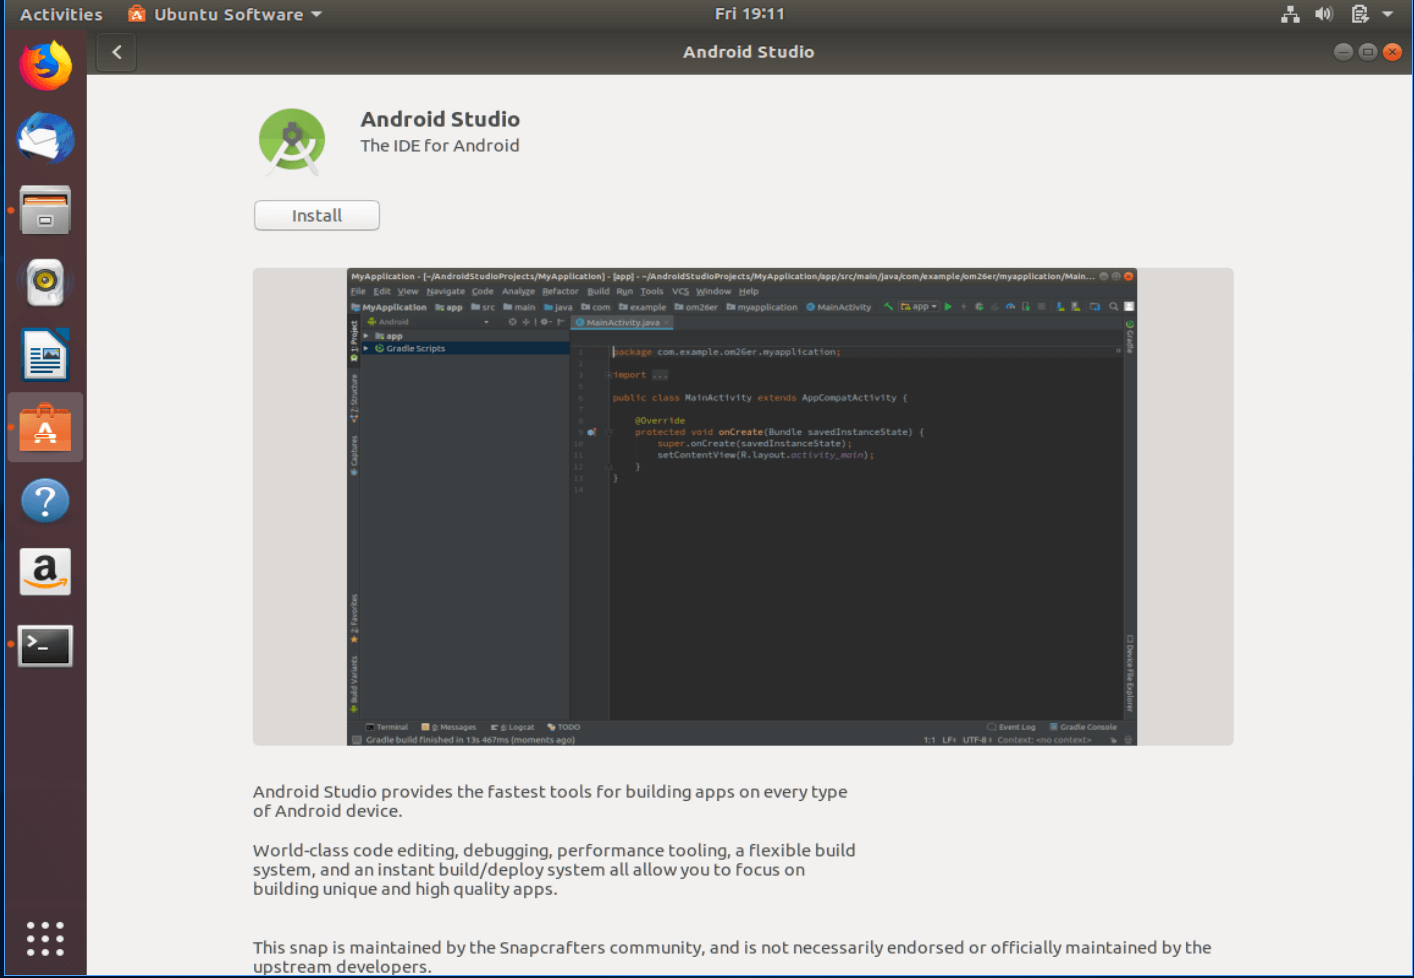
Once done, click Launch to run the Setup Wizard and proceed to download additional components and packages to complete the installation. Note that this too may take some time (depending on the speed of your connection and components you chose to install) so go ahead and grab another cup of coffee.
Upon completion, you will be able to start using Android Studio with a new or existing project.
If you prefer the official download over the community-maintained Snap, you can download and install Android Studio manually and according to the instructions released by Google.
Start by downloading the Linux package of Android Studio from the Google website. Yup, it’s time to get some coffee while the 1 GB file downloads.
Right click the zip file in the file browser and choose “Extract Here”. You can move the file out of the Downloads folder later, if you wish.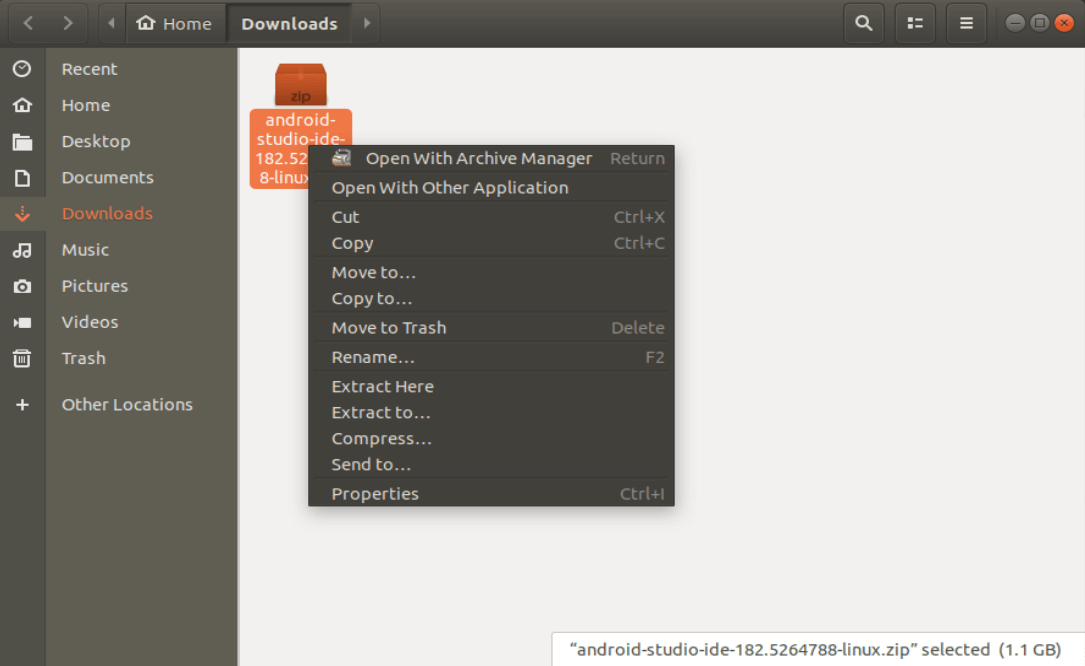
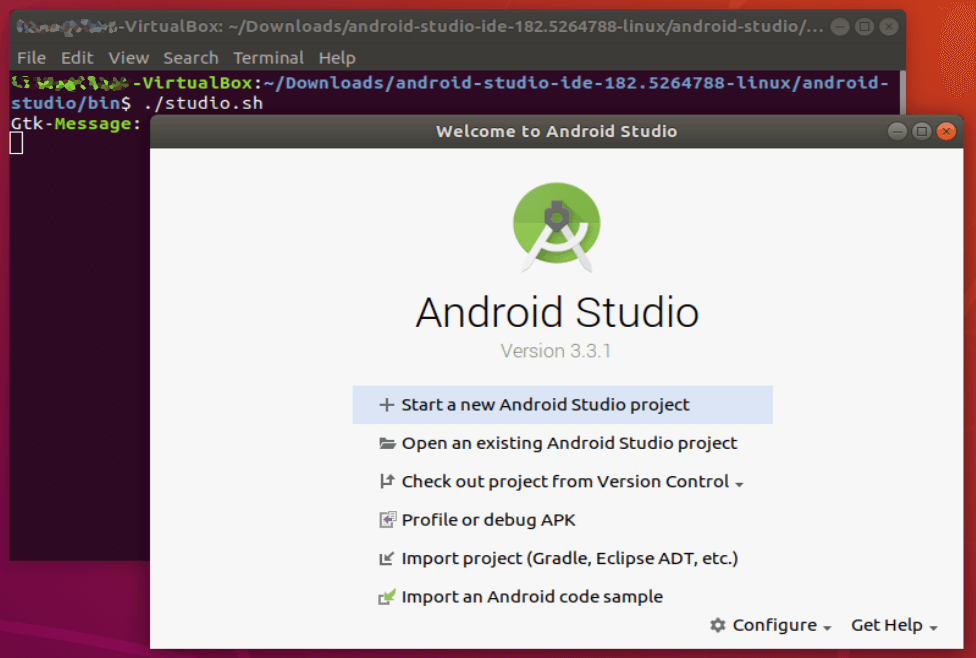
Navigate to the android-studio/bin/ directory, and open a terminal by right clicking and choosing “Open in Terminal”.
In the terminal, execute studio.sh by entering:
./studio.sh
If you have previous Android Studio settings you’d like to import, select them now. If not, proceed with new setting and click OK.
The Setup Wizard will launch, and proceed to download additional components and packages to complete the installation. Note that this too may take some time (depending on the speed of your connection and components you chose to install) so go ahead and grab another cup of coffee.
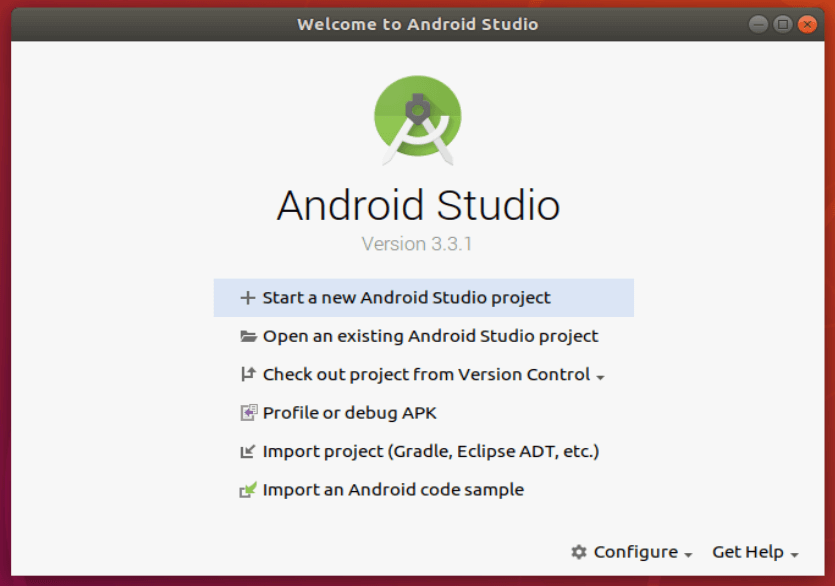
Once all the components you selected finish downloading, the app will launch and you can start working on your code.
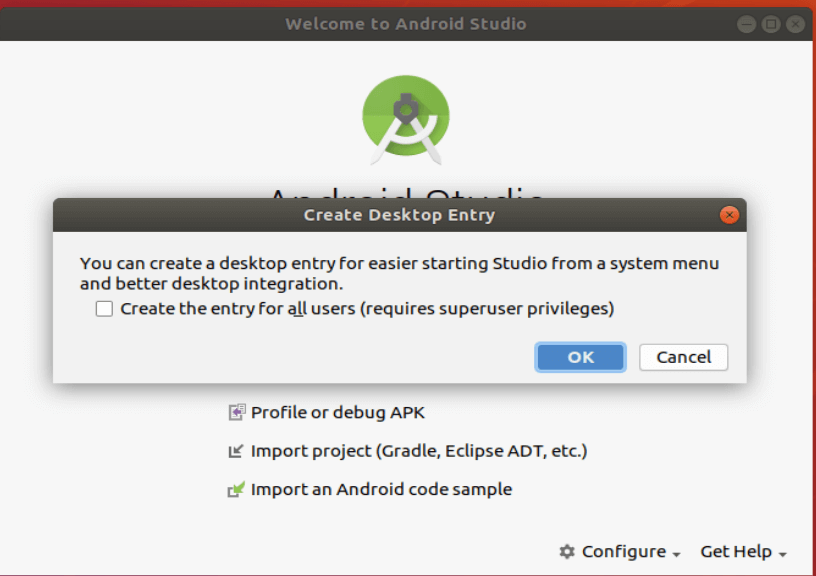
To make sure you can access the app quickly and without the terminal, choose “Configure” on the bottom right and “Create Desktop Entry”.
Caffeinated enough from the download and installation process? Good! Now get coding.
Explore recent posts
//Explore recent posts
//
3 -min read

5 -min read

4 -min read

More How-to's
//3 -min read
3 -min read
3 -min read