//
Subscribe to the Tabnine newsletter
//
Get news and updates about AI, software development, and more.

WebStorm is a JetBrains IDE that prides itself on being the “smartest JavaScript IDE” on the market. But is it? And what exactly can WebStorm do for you?
WebStorm is part of JetBrains’ suite of language-specific IDEs. This specialized tool focuses on JavaScript development and features an extensive suite of built-in developer tools, fast navigation, search, customizable environments, and real-time teamwork integrations.
One of the main features of WebStorm is its support for TypeScript source code. WebStorm recognizes both .ts and .tsx files with code support systems to make your workflow as seamless as possible.
For JavaScript developers, especially those working with Angular, TypeScript support in an IDE can make or break the productivity glass ceiling.
Here is a quick guide on how to run TypeScript in WebStorm and develop your first app to get you started.
When it comes to TypeScript with WebStorm, you don’t have to do much. This is because WebStorm comes with built-in project templates that you can use as you start.
When you start WebStorm, you will have the option of choosing an empty project or a boilerplate setup for the most popular JavaScript libraries and frameworks such as Angular, Cordova, Express, Meteor, Node.js, React, React Native, and Vue.js.
If you are creating a new project from scratch and require a tsconfig.json file, the boilerplate can easily be booted up by going to File > New > tsconfig.json File.

You will get a default tsconfig.json file that looks something like this:
| { “compilerOptions”: { “module”: “commonjs”, “target”: “es5”, “sourceMap”: true }, “exclude”: [ “node_modules” ] } |
To set up your TypeScript project, the convention is to have a src folder and a build folder. The src folder is where all your code will go, while the build folder is where your JavaScript build outputs will compile to.
Once this is completed, you need to add “outDir” : “build” to your compilerOptions. The build at outDir corresponds with the build folder you’ve created. In theory, this can be anything you want, as long the name corresponds to one another.
To tell TypeScript which folder you want to build, add the folder path to include.
Here is an example of the final TypeScript tsconfig.json file setup with build and src directories:
| { “compilerOptions”: { “module”: “commonjs”, “target”: “es5”, “sourceMap”: true, “outDir”: “build” }, “exclude”: [ “node_modules” ], “include”: [ “src/scripts/**/*” ] } |
Now that we’ve got the basics all done, you can start creating your TypeScript project inside WebStorm. The next step will be to compile TypeScript in WebStorm.
The easiest way is to right-click anywhere on your TypeScript workspace, and right at the bottom of the list that shows is a Compile TypeScript option. Once you’ve clicked on that, your TypeScript code will compile in WebStorm for you automatically.

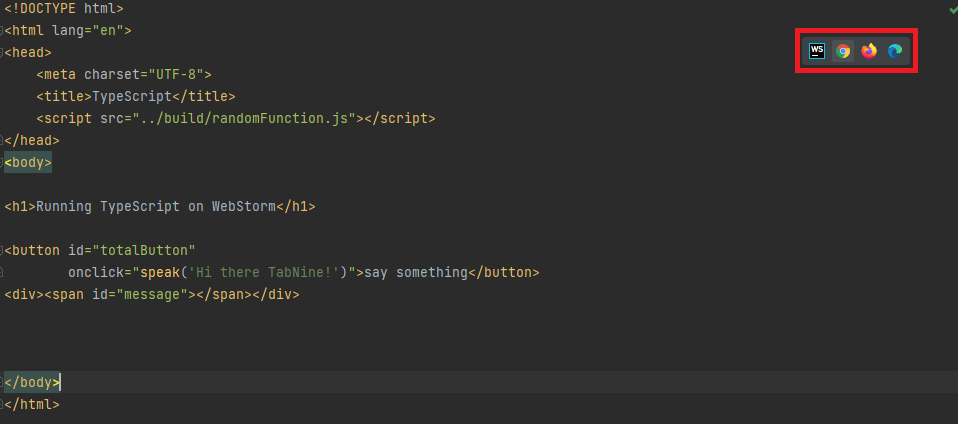
It is good to note that for TypeScript to compile correctly, the include inside your tsconfig.json must correspond with the file path. In the screenshot above, the file path for the file sits inside src/scripts. Our include portion corresponds with this:
| … “include”: [ “src/scripts/**/*” ] … |
There are multiple ways to run your TypeScript. One way is to and select Run.

Alternatively, you can use the keyboard command combination Ctrl + Shift + F10. These two options will bring up a localhost page on your default browser.
However, if you want to test on a different browser, you can select from one of the browser icons located on the top right of your screen – as highlighted in red below.
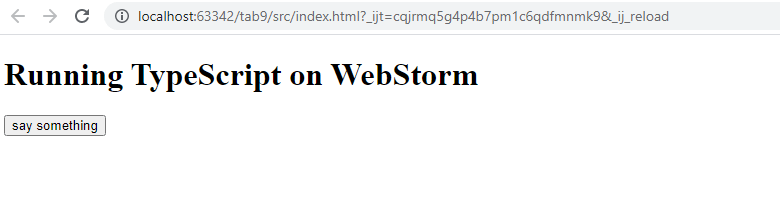
Here is a screenshot of the localhost generated based on the code above.
Once you have your localhost up, WebStorm sets you up with hot reloading automatically. This means that you don’t have to intervene with a page refresh every time you alter your code.
At some point, you’re going to want to debug your code. While console.log() may help you track things down, WebStorm’s debugging tools can speed up the process without littering your code. Not only that, using console.log() to debug is not the best practice.
While console.log can help with particular instances, most of the time, what you need is for your code to slow down. This is so you can mentally digest what is going on and pinpoint precisely what is happening, why things are happening, and if it contributes to the bug you are trying to fix.
When it comes to TypeScript, you are most likely working on a single page application (SPA) or node.js based server-side application. This means you are also dealing with things like lifecycles. Using breakpoints lets you pause your code so you can have a chance to see the line-by-line impact for each region of code.
To debug TypeScript in WebStorm, you can create breakpoints in your code by click on the line number. This will produce a red dot, where the code will be paused once it hits the breakpoint.

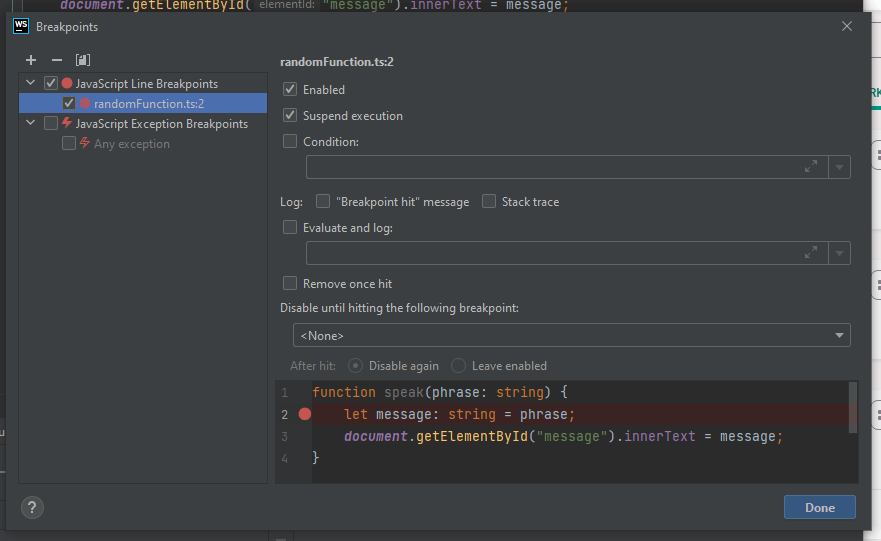
If you right-click on your breakpoint’s red dot, you can also configure it with conditionals, logging, stack tracing and disable it based on exceptions. These features can come in handy when you want to finetune your debugging process in WebStorm for TypeScript.
Here is a screenshot of what it looks like:
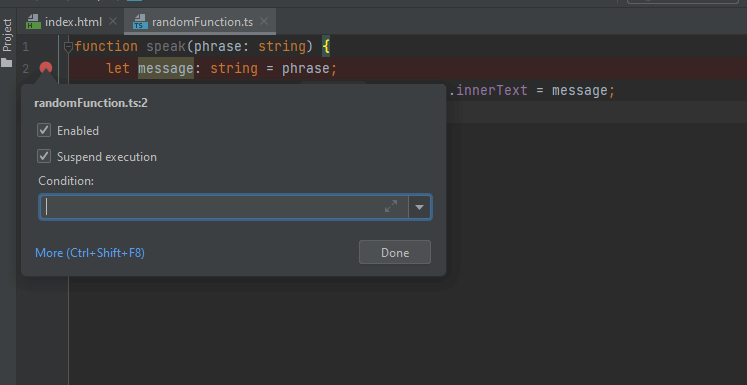
To bring up more options, click on More or Ctrl + Shift + F8. Here is the rest of what WebStorm offers for TypeScript debugging.
To run the debugger, click on the little green bug icon. This will bring up a new localhost window, where you can test out your code process flow.

Here is an example of what WebStorm’s TypeScript debugger looks like in action with breakpoints:
When it comes to TypeScript, WebStorm does most of the heavy lifting for you. There is minimal setup – other than setting up your project. Running TypeScript in WebStorm is a breeze, with no need to deal with command lines, configuring localhosts, or too many steps for compiling TypeScript into JavaScript code. Everything comes out of the box, ready to go, and fully optimized for TypeScript projects.
Debugging is integrated by default, so you don’t need to set it up or download additional plugins to get started. For TypeScript in WebStorm, things work.
Overall, if you want a seamless experience, give WebStorm a try for your next TypeScript project and experience the difference in your coding workflow. While this isn’t a free IDE, the subscription cost is worth the benefits that it brings to your ability to produce code quickly.
Explore recent posts
//Explore recent posts
//
3 -min read

5 -min read

4 -min read

More How-to's
//3 -min read
3 -min read
3 -min read